How-to · Images
How to save an image as PNG in Chrome
The short answer
Chrome's built-in “Save image as…” can only save the file in its original format. Install Image Converter, right-click the image and choose Convert image to… → PNG: it re-encodes the image locally and downloads the PNG — no upload, no account. JPG and WebP work the same way, free.
- 1
Install Image Converter in Chrome or Edge.
- 2
Right-click the image on the page and choose “Convert image to…” → PNG.
- 3
The image is re-encoded locally and downloads as name-converted.png.
- 4
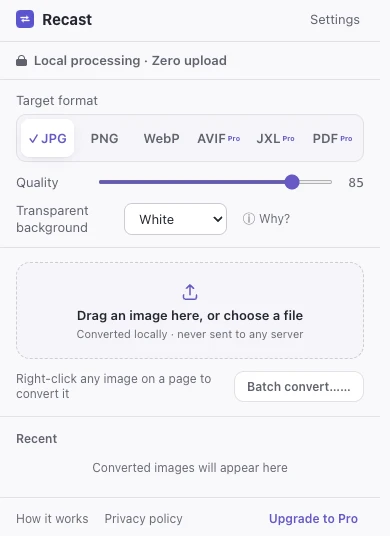
For a file already on disk, open the popup (Ctrl+Shift+Y), drop the file and pick PNG.
- 5
Optional: in Settings, set PNG as the default target so it is always the first menu item.
Chrome's built-in Save image as… has a quiet limitation: it saves the image in whatever format the site served — and more and more sites serve WebP or AVIF. The “Save as type” dropdown in the save dialog is not a converter; typing .png just renames the bytes, it doesn't change them. To really save an image as PNG, the image has to be decoded and re-encoded, and that's what the Image Converter extension adds to Chrome's right-click menu — done entirely on your machine, with nothing uploaded.
Right-click the image and pick PNG
Install the extension, right-click any image on any page and choose Convert image to… → PNG. The image is converted on your machine and downloads as name-converted.png (the naming template is editable in Settings). The menu also remembers your last-used format and puts it first, so the second image is right-click, top item, done.
“Save image as type”, not just as PNG
The same menu carries JPG and WebP, which makes this the general save-image-as-type workflow: whatever format the page serves, you decide the format at save time. PNG is the safe pick when you need lossless pixels or transparency; JPG when you want small photos; WebP when you want both small and transparent.
Convert a file you already saved
Already sitting on a WebP download? Click the toolbar icon (or press Ctrl+Shift+Y), drop the file into the popup, choose PNG and save. The quality slider only matters for lossy targets like JPG and WebP — PNG is lossless, so there is nothing to tune. After a conversion the popup can also copy the result to your clipboard as PNG, handy for pasting into a doc or chat.
What's free and what isn't
Saving as PNG, JPG and WebP is free, one image at a time. The Pro upgrade — a one-time purchase, not a subscription — adds AVIF and JXL output, combining images into a PDF, and batch conversion with ZIP output. Free or Pro, every conversion runs locally: the popup's badge says Local processing · Zero upload, and you can verify it yourself by converting with your network disconnected.
Fighting one specific WebP file right now, without installing anything? Our local WebP → PNG converter runs in the browser tab the same way — the extension simply puts that conversion one right-click away on every page.