How-to · PDF
How to extract pages from a PDF as images
The short answer
Open PDF to Image, pick just the pages you need from the thumbnail grid — or type a range like 4, 9-12 — and export them as JPG or PNG. Everything renders on your device: no upload, no sign-up, works offline.
- 1
Click the PDF to Image icon in Chrome and choose “PDF → Images”, or drop the PDF onto the popup.
- 2
Select just the pages you need — click thumbnails or type a range like 4, 9-12, 30.
- 3
Pick PNG for charts and text, or JPG for scans, and choose a clarity preset.
- 4
Click “Convert selected pages” — only the selected pages are exported.
- 5
Save the images — each is named with its page number, e.g. report-14.jpg.
You rarely need a whole PDF. It's page 14 with the chart, the two pages of the appendix, the one page of a 60-page report that actually answers the question — and you need it as an image, because the place it's going (a chat, a slide, a ticket) doesn't take PDFs. The usual workarounds are bad: a screenshot caps you at screen resolution and crops whatever didn't fit, and upload-based extractors mean handing the entire document to a server just to get one page back. A free Chrome extension does this properly and locally: PDF to Image shows every page as a thumbnail, lets you pick exactly the ones you want, and renders each selected page as a JPG or PNG on your own machine.
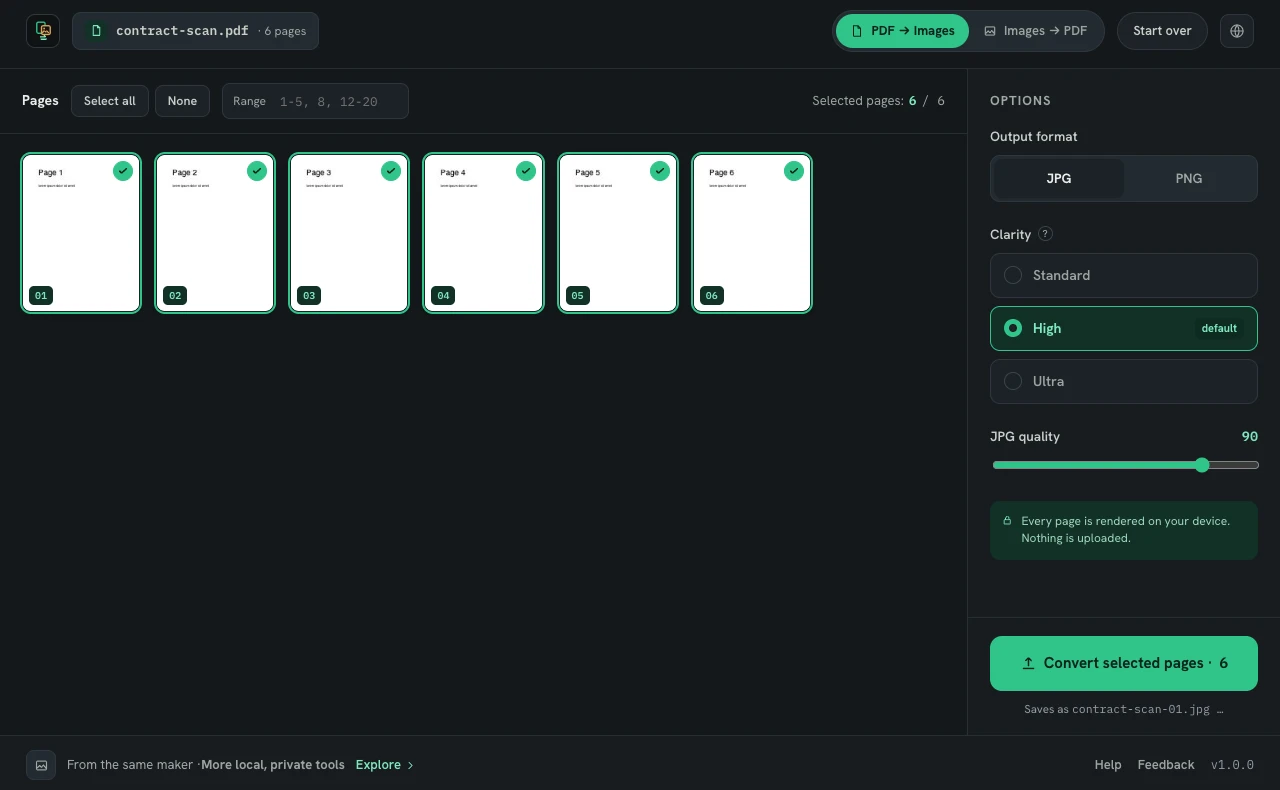
Open the PDF in the workbench
Click the extension icon and choose PDF → Images, or drop the file onto the popup. The workbench opens in its own tab and builds a preview of every page on your device.
Select only the pages you want
Click thumbnails to toggle them, or type a range like 4, 9-12, 30. Select all and None are there when you change your mind. Only the selected pages are exported — nothing else is rendered, which also keeps big documents fast. For very large PDFs the extension suggests working in batches.
Pick a format and clarity
PNG keeps text and line art lossless and crisp — the right call for a chart headed into a slide. JPG is smaller and fine for scans and photo-heavy pages. The clarity presets — Standard, High and Ultra, roughly 96, 150 and 240 dpi — set the rendering resolution; use Ultra when someone will zoom in.
Convert and grab your pages
Click Convert selected pages. Pages appear as they finish, each named after the source with its page number — report.pdf page 14 becomes report-14.jpg — so you can tell exactly which page you're attaching.
Extracting the pages vs. extracting embedded images
One honest distinction: this tool renders whole pages as images. It doesn't dig the original embedded image objects out of the PDF's internals. In practice a page rendered at Ultra captures a figure at high fidelity, and a quick crop afterwards isolates it — but if you specifically need the untouched embedded files, that's a different kind of tool.
Nothing leaves your machine
The extension requests zero permissions at install and does all rendering inside its own page. Turn off Wi-Fi and it works the same — the one test no upload site can pass. Free, no account, no tracking. If you need the extracted pages as a smaller standalone PDF instead of images, splitting the PDF is the better path.